In summary:
- Mastering weight distribution by keeping loads low and forward is more critical than total weight for e-bike stability and safety.
- Successful on-the-road charging relies on a protocol of “charging diplomacy”—offering value as a customer rather than just asking for a favor.
- Realistic range planning requires “energy calculus,” using apps like Komoot to factor in elevation and surface type, not just distance.
- Carrying tour-ending spares like a derailleur hanger or spare belt is non-negotiable for self-sufficiency in remote areas.
The dream of e-bike touring is one of silent roads, scenic vistas, and the quiet hum of assistance cresting a hill. The reality, for many, is the creeping dread of a single, flashing red bar on the battery display, miles from the nearest town. This “range anxiety” can transform an adventure into a stressful calculation. While many guides offer simple advice like “plan your route” or “carry a spare battery,” they often miss the fundamental system that separates a seamless journey from a logistical nightmare.
The common wisdom focuses on the *what* but ignores the *how*. It tells you to find power but not how to secure it. It suggests carrying more weight without explaining how to manage it. This approach leaves too much to chance, turning your tour into a series of gambles on friendly cafe owners and optimistic range estimates. True mastery of e-bike touring logistics isn’t about hoping for the best; it’s about building a resilient system before you even pedal out the door.
The secret lies in shifting your mindset from a reactive power-seeker to a proactive energy manager. It’s about understanding the core principles of weight equilibrium, the art of charging diplomacy, and the science of predictive routing. This guide provides that system. We will deconstruct the key logistical challenges of multi-day e-bike travel, providing the experienced planner’s framework to eliminate anxiety and unlock the true freedom of the open road. Forget guesswork; it’s time to master your e-bike’s energy calculus.
text
This article provides a structured approach to mastering the critical logistics of your next e-bike tour. Explore the sections below to build your expertise, from managing weight distribution to leveraging the best digital tools for the job.
Summary: A Planner’s Guide to E-Bike Touring Logistics
- Why Rear-Heavy Panniers Cause Speed Wobbles on Descents?
- How to Carry a Second Battery Safely Without Breaking the Rack?
- Asking for Power: Etiquette for Charging at Cafes During Lunch Stops
- The Error of Touring Without a Spare Belt or Hanger
- When to Stop: Calculating Realistic Daily Distances Based on Elevation?
- When to Charge: Strategic Stops for Rides Over 50 Miles
- 20L Pair vs Single 40L: Which Affects E-Bike Balance Less?
- Google Maps vs Komoot: Which App Best Predicts E-Bike Battery Usage?
Why Rear-Heavy Panniers Cause Speed Wobbles on Descents?
A high-speed wobble is one of the most terrifying experiences a cyclist can have. On an e-bike, the risk is amplified due to the inherent rear-biased weight of the motor and battery. When you load heavy panniers exclusively onto a rear rack, you create a perfect storm for instability. The excessive weight over the back axle effectively unweights the front wheel, reducing its traction and its ability to hold a line. This imbalance creates a pendulum effect; any small oscillation from the road surface or a steering input can quickly escalate into an uncontrollable, frame-flexing wobble.
The physics are unforgiving. To maintain stability, the bike’s center of gravity must be kept low and centered between the wheels. Experienced tourers understand that proper weight equilibrium is crucial. Some bicycle shop owners recommend that as much as 75% of the total load should be placed over the front wheel to counteract the rear weight and ensure the front tire remains firmly planted. A heavy rear load makes the bike “hinge” in the middle, and at speeds over 20 mph, this can be disastrous.
Preventing speed wobbles is a matter of proactive load management and reactive control. If you find yourself in a wobble, resist the instinct to brake hard or sit up, as this will only worsen it. Instead, focus on dampening the oscillations.
- Clamp your thighs firmly against the top tube. This uses your body mass to interrupt the harmonic frequency of the wobble.
- Shift your weight forward. Stay low in the drops or on the handlebars instead of sitting upright to press the front wheel into the road.
- If you consistently tour with a rear-heavy load, consider adding about 10 pounds of weight to your front forks (e.g., with water bottles) to counterbalance the rear load and stabilize the steering.
How to Carry a Second Battery Safely Without Breaking the Rack?
The promise of doubling your range by carrying a second battery is tempting, but it introduces a significant logistical challenge: weight. A modern e-bike battery is a dense, heavy object. A typical Bosch battery, for example, weighs around 2.5 kg (5.5 lb). Simply strapping this compact weight to a standard pannier rack is a recipe for failure. Most racks are rated for distributed loads, not a single, heavy point load that will vibrate and bounce with every bump in the road.
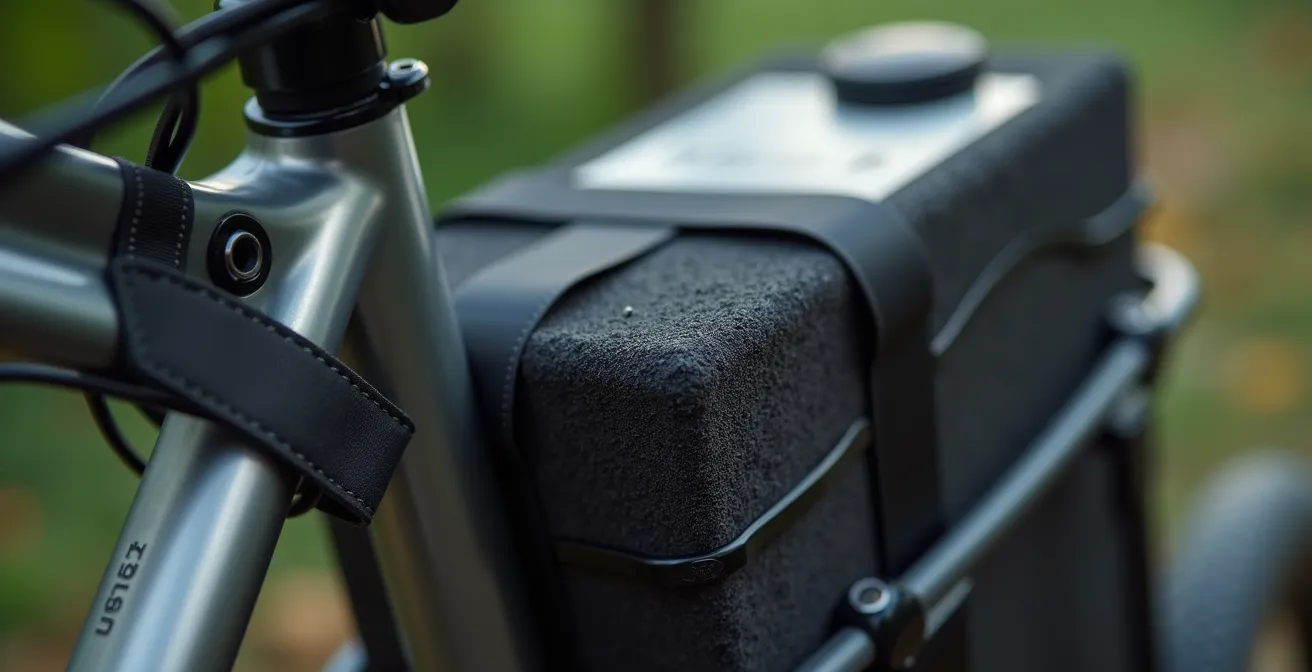
A broken rack in a remote area is a tour-ending event. The key to carrying a second battery is to do so securely, without compromising the bike’s structure or balance. There are several professional-grade solutions. Some premium touring e-bikes, like those detailed in an e-bike touring guide from Tern Bicycles, offer integrated dual-battery systems where the frame itself is designed to accommodate the second battery. This is the gold standard for safety and handling.
For bikes without this feature, the best practice is to carry the battery inside a pannier. However, it must be positioned correctly. Place the battery at the bottom of the pannier, as close to the rear axle as possible and centered against the rack. This keeps the center of gravity low. Use padding like clothing or a foam block to ensure it cannot shift or rattle during the ride. Never place it in the top of a pannier or in a trunk bag, as this high center of gravity will severely impact handling and increase the risk of speed wobbles.
Asking for Power: Etiquette for Charging at Cafes During Lunch Stops
For the “credit card” tourist, cafes, pubs, and restaurants are essential strategic assets. They are not just places for food and rest; they are your charging network. However, securing access to a power outlet requires more than just asking. It requires a tactful approach we call “charging diplomacy.” You are not just asking for a favor; you are entering a transaction. You offer your business as a paying customer in exchange for a small amount of electricity. Framing it this way is key to a positive response.
Most business owners are accommodating, especially in tourist-friendly areas. As the experts at Savvy Cycling UK note in their guide, “Cafes, restaurants and pubs will often let you charge your battery whilst having a coffee or lunch.” The key is to be a good guest. Never just plug in without asking, and always make it clear you intend to be a paying customer for the duration of the charge.
Being prepared and considerate makes all the difference. An e-bike charger can draw a significant amount of power and can be a tripping hazard if poorly placed. Following a clear protocol minimizes inconvenience for the establishment and maximizes your chances of success every time.
Your Action Plan: Best Practices for Cafe Charging
- Ask Politely and State Your Intent: Approach the staff, ask permission to charge, and clearly state that you’ll be a paying customer for the next 90 minutes or so.
- Bring an Extension Cord: Carry a 6-foot extension cord. This allows you to use an out-of-the-way outlet instead of occupying a prime spot near a table.
- Offer to Share: If outlets are scarce, having a multi-USB adapter to share with others can be a gesture of goodwill.
- Prioritize Safety: Always place your charger on a hard, non-flammable surface like a tile floor, never on a carpet, rug, or wooden bench where it could overheat.
- Never Leave it Unattended: For both theft and fire safety reasons, never leave your battery and charger unattended while they are plugged in.
The Error of Touring Without a Spare Belt or Hanger
Experienced tourers operate on a principle of failure-proofing. This involves identifying which part failures are merely inconvenient and which are “tour-ending.” A flat tire is an inconvenience; you can patch it and continue. A broken derailleur hanger, however, is a catastrophic failure. This small, bike-specific piece of metal is designed to bend or break to protect your frame. Without a spare, your tour is over until you can find a bike shop that stocks the exact model for your specific frame, which is nearly impossible in a small town.

The list of tour-ending parts for an e-bike is short but critical. Beyond the derailleur hanger, a spare belt for a belt-drive system is absolutely essential. These belts are not universally available and require specific knowledge to install correctly. Other critical, hard-to-source parts include the bolts for your specific pannier rack, the mounting bracket for your display, and the small sensor magnet on your wheel or crank that tells the motor when to engage.
Your spare parts kit should be built around these potential single points of failure. It’s not about carrying an entire workshop, but about carrying the small, lightweight parts that cannot be improvised or sourced on the road. Along with the physical parts, your digital toolkit should include offline PDF manuals for your bike and its components, as well as clear photos of your bike’s serial number and the derailleur hanger itself to aid in identification if you need to order a replacement.
When to Stop: Calculating Realistic Daily Distances Based on Elevation?
The manufacturer’s advertised range for your e-bike—”up to 80 miles”—is the single most misleading number in your trip planning. This figure is based on ideal conditions: a lightweight rider on flat, smooth pavement with a tailwind, using the lowest assist level. For a fully loaded touring cyclist, this number is pure fiction. The most critical variable that manufacturers ignore is elevation. Climbing hills is the single biggest drain on your battery.
This is where “energy calculus” becomes essential. You must learn to think in terms of watt-hours (Wh), the true measure of your battery’s capacity, and how that capacity is consumed by terrain. As a baseline rule, your daily distance should be planned around elevation gain, not just total miles. A 40-mile day with 4,000 feet of climbing will consume far more energy than a 60-mile day on a flat river path.
So, how do you calculate a realistic daily distance? Start by finding your baseline consumption on flat ground. Then, create a “climbing penalty.” Through experience, you will learn your personal penalty, but a conservative starting point is to subtract 5-8 miles from your total flat-ground range for every 1,000 feet of elevation gain. For example, if you know you can realistically get 60 miles on flat terrain, a route with 3,000 feet of climbing will likely reduce your effective range to 36-45 miles. This simple calculation forces you to choose campsites or hotels that are realistically within reach, preventing the dreaded final-mile battery death.
When to Charge: Strategic Stops for Rides Over 50 Miles
For longer touring days, a single charge is often not enough. Success depends on strategic “opportunity charging” during the day. This requires a deeper understanding of your bike’s energy consumption. A key metric for your energy calculus is the watt-hours per mile (Wh/mile). While it varies, recent battery performance data suggests that many mid-power 500W e-bikes average around 20-25 Wh per mile. If you have a 500Wh battery, this gives you a real-world baseline of 20-25 miles of range in normal, mixed-assist usage—far less than advertised.
Understanding this, your mid-day stop is no longer just for lunch; it becomes a planned, strategic charging session. The goal is not always a full charge. A 90-minute lunch break is often enough to add a significant amount of range, getting your battery from a worrying 20% back up to a confident 80%. This “top-up” is often all you need to comfortably reach your overnight destination.
Different charging scenarios yield different results, and planning your stops accordingly is crucial. A brief coffee break provides a small but potentially vital boost, while a long lunch can add dozens of miles to your day. This comparative analysis from Cycling About shows just how to think about your stops strategically.
| Charging Strategy | Time Required | Range Added | Best For |
|---|---|---|---|
| Quick Top-Up (20-80%) | 90 minutes | 50km/31 miles | Lunch stops |
| Full Charge (0-100%) | 3-4 hours | 80-100km/50-62 miles | Overnight stays |
| Opportunity Charge | 15-30 minutes | 10-15km/6-9 miles | Coffee breaks |
By integrating these charging times into your daily itinerary, you can confidently plan rides that extend well beyond a single charge. A 60-mile day becomes easily achievable with one well-placed 90-minute lunch and charging stop.
20L Pair vs Single 40L: Which Affects E-Bike Balance Less?
When it comes to panniers, the math seems simple: two 20L bags equal one 40L bag. In terms of volume, this is true. In terms of bike handling and safety, they are worlds apart. A single, large 40L pannier, especially if not packed perfectly, creates a significant asymmetric load. It acts like a pendulum, constantly trying to pull the bike to one side and working against your efforts to maintain balance. This effect is magnified on an e-bike, where the motor already creates a slight weight imbalance.
The superior solution is always a pair of smaller panniers. A 20L pair allows you to meticulously balance the load from side to side. You can place heavier items on the side opposite your motor to create a near-perfect equilibrium. According to recommendations from experienced tourers, an ideal weight distribution for a touring bike is approximately 60% on the rear wheel and 40% on the front. A balanced pair of rear panniers is the first step toward achieving that goal, which is then perfected by adding a front load.
Case Study: The Real-World Impact of Pannier Choice on Handling
Handling tests have shown a dramatic difference between the two setups. A single, poorly packed 40L pannier was found to reduce a rider’s confident descending speed by a staggering 10-15 mph compared to a well-balanced pair of 20L panniers. The dual-pannier setup not only centers the load but also allows the rider to actively counteract the motor’s weight, dramatically improving stability and control during high-speed maneuvers and descents.
Choosing two smaller panniers over one large one is not a matter of preference; it is a fundamental decision for safety and control. It gives you the ability to fine-tune your bike’s balance, reducing rider fatigue and significantly increasing stability when it matters most.
Key takeaways
- Balance is non-negotiable: Mastering weight distribution by keeping loads low, forward, and balanced side-to-side is the top priority for e-bike safety and handling.
- Charging is diplomacy: Secure on-the-go power by acting as a valuable customer. Be prepared, polite, and safe to build a reliable charging network.
- Plan for elevation, not just distance: Use advanced tools like Komoot to calculate your true range based on terrain and elevation, abandoning misleading manufacturer estimates.
Google Maps vs Komoot: Which App Best Predicts E-Bike Battery Usage?
For navigation, not all apps are created equal. Relying on a car-centric app like Google Maps for e-bike touring is a common rookie mistake. While excellent for finding the shortest or fastest route between two points, it lacks the nuanced data a cyclist needs. It cannot differentiate between a smooth paved road and a rough gravel track, nor does it provide the detailed elevation profiles necessary for predictive routing and accurate battery management.
Komoot, on the other hand, is built from the ground up for cyclists and hikers. It offers a dedicated “E-Bike” sport profile that allows you to input your fitness level to tailor routing. Its primary advantage is its detailed surface analysis and comprehensive elevation data. Knowing a route contains long stretches of unpaved road or a series of steep climbs allows you to adjust your battery usage and plan charging stops proactively. Google Maps simply doesn’t offer this level of granular detail.
The differences are stark when compared side-by-side. Komoot provides the data needed for true energy calculus, while Google Maps is best used as a secondary tool for scouting specific locations.
| Feature | Komoot | Google Maps |
|---|---|---|
| E-Bike Sport Profile | Yes – with fitness level input | No |
| Surface Analysis | Detailed (asphalt, gravel, unpaved) | Limited |
| Battery Consumption Estimate | Based on terrain type | Not available |
| Charging Station Locator | Community-sourced | Via Street View scouting |
| Elevation Profile | Comprehensive | Basic |
The ultimate power-user workflow combines the strengths of both. By using these tools in tandem, you can create a highly reliable and detailed route plan that minimizes surprises and eliminates range anxiety.
- First, plan your macro-route in Komoot to understand the big picture: total elevation, surface types, and estimated riding time.
- Next, use Google Maps Satellite and Street View to zoom in on your planned lunch or coffee stops. Scout for visible outdoor outlets on cafes, libraries, or park pavilions.
- Over your first few trips, document your actual range versus Komoot’s prediction. This allows you to create a personal “correction factor” for future, even more accurate, trip planning.
Ultimately, true freedom on an e-bike tour comes not from a bigger battery, but from a better plan. By mastering these systems of weight balance, charging diplomacy, and predictive routing, you replace anxiety with confidence, allowing you to focus on the view ahead instead of the battery gauge below. Apply this framework to your next trip, and you will transform your journey from a logistical challenge into a pure adventure.
Frequently Asked Questions about E-Bike Touring Logistics
Which e-bike parts are considered ‘tour-ending’ failures?
Derailleur hangers (which are frame-specific), belt-drive belts, display mounting brackets, and sensor magnets are critical parts that cannot be easily sourced in remote areas. A failure in any of these can effectively end your tour if you do not have a spare.
What digital resources should I carry?
Always have offline resources on your phone. This includes PDFs of your bike’s technical manual, photos of all serial numbers, and close-up photos of specific parts like your derailleur hanger. This information is invaluable for identifying and ordering the correct replacement parts if needed.
How do belt-drive maintenance requirements differ?
Belt-drive systems are low-maintenance but highly specialized. They require specific tools for setting the correct tension, and most local bike shops lack the tools or experience to work on them. For a belt-drive tour, self-sufficiency is not optional; it is essential.