The greatest barrier to escaping the city on your e-bike isn’t the distance; it’s the fear of the unknown. Mastering a few key logistical principles is what truly unlocks backcountry freedom.
- Proactively manage your battery as a finite resource, not just a power source, reserving 30% for unexpected headwinds or fatigue.
- Adopt a “layered” approach to safety, combining redundant navigation tools with a tiered communication plan for remote areas.
Recommendation: Shift your mindset from simply ‘planning a ride’ to ‘managing variables’. This foresight is the key that transforms potential anxiety into confident adventure.
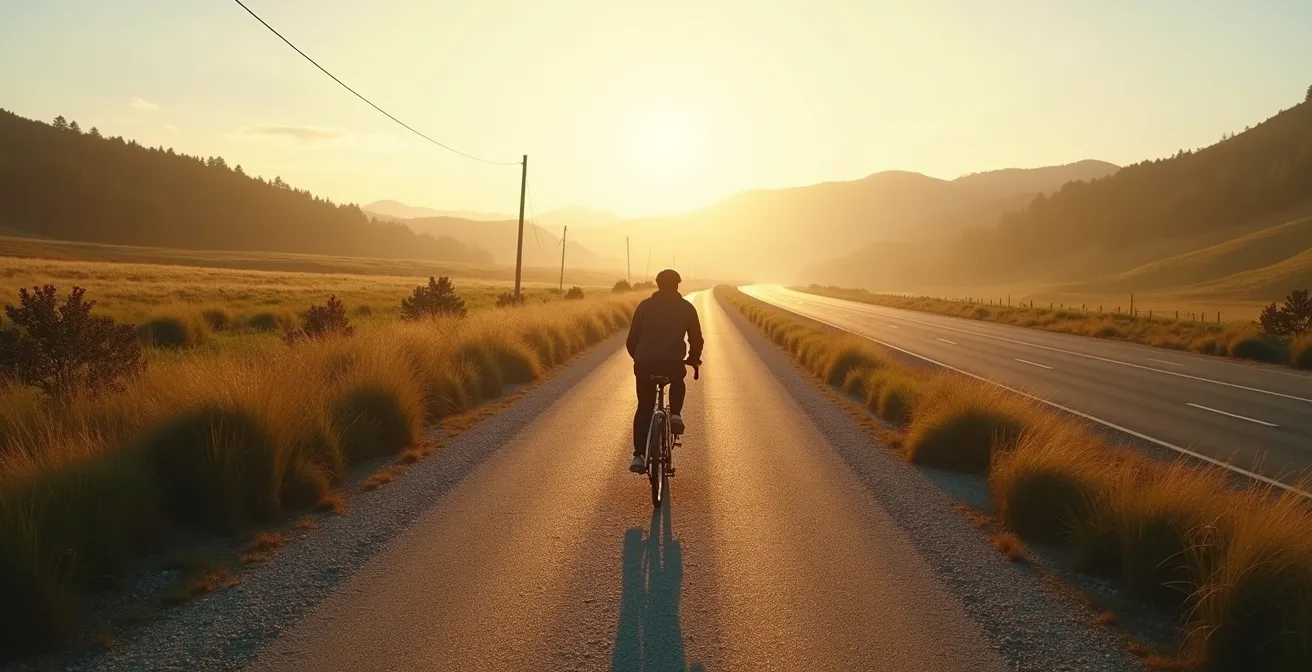
The hum of your e-bike is a familiar sound on city streets, a reliable partner in your daily commute. But lately, you’ve felt a different call—the pull of the gravel path that snakes out of town, the quiet country road disappearing over a hill. This desire to transition from utility rider to weekend adventurer is a natural evolution. Yet, it’s often met with a wall of logistical questions and a dose of “range anxiety” that keeps you tethered to the concrete jungle. You know how to navigate traffic, but what about navigating a dead zone with a dying battery?
Many guides will offer basic advice: check your tire pressure, wear a helmet. While essential, this barely scratches the surface of what it takes to confidently leave the city behind. They tell you to plan, but not how to account for the unpredictable variables of the wild. They mention e-bikes are heavy, but not the specific techniques needed to transport them without damaging your bike or your back. The real challenge isn’t just about finding a route; it’s about building a system of logistical foresight that makes you self-sufficient.
This is where we shift the conversation. What if the key to unlocking these adventures wasn’t about having the most expensive gear, but about mastering the logistics? This guide is built on that principle. We will move beyond the obvious and dive into the practical strategies an experienced guide uses to manage risk and maximize enjoyment. We’ll treat your battery like a budget, your safety plan like an insurance policy, and your route like a puzzle to be solved before you even pedal out.
By focusing on the ‘why’ behind the rules and the ‘when’ behind the actions, you’ll gain more than just a pre-planned route. You’ll acquire the confidence to create your own adventures, turning the great unknown from a source of anxiety into the very reason you ride. This article breaks down the essential logistical pillars to make that transition seamless and safe, transforming your powerful commuter into a true vessel of exploration.
To help you navigate these crucial concepts, this guide is structured to build your confidence step-by-step. Explore the topics below to master the art of e-bike adventure beyond the city limits.
Summary: A Practical Guide to E-Bike Adventuring Beyond the City
- Why You Need to Save 30% Battery for the Return Trip Headwind?
- How to Transport Heavy E-Bikes on Car Racks Without Damaging the Frame?
- Solo Exploration: Essential Safety Protocols for Remote E-Bike Rides
- The Mistake of Riding E-Bikes on “Non-Motorized” Trails
- When to Take Breaks: Preventing Saddle Sores on Your First 4-Hour Ride?
- When to Download Maps: Navigating Dead Zones Beyond City Limits
- When to Pack a Trauma Bandage vs Just Band-Aids?
- Credit Card Touring vs Camping: Managing E-Bike Charging Logistics on the Road
Why You Need to Save 30% Battery for the Return Trip Headwind?
Range anxiety is the number one fear for aspiring e-bike adventurers. The mistake most new riders make is thinking of their battery linearly, assuming the second half of the ride will consume the same energy as the first. This is a critical error in logistical foresight. The return trip is almost always more demanding due to physical fatigue and, most importantly, the high probability of a return headwind. A tired body produces less power, forcing you to rely more heavily on the motor at the exact moment its resources are lowest.
Think of your battery not as a full tank of gas, but as a budget. The “30% Rule” is your emergency fund. This buffer isn’t just for headwinds; it accounts for detours, steeper-than-expected climbs, or simply the extra energy needed when you’re exhausted. While technology is constantly improving, with some data showing e-bike battery range improved by 15% in recent years, this efficiency is best used to extend your planned adventure, not to shrink your safety margin. The ability to ride an e-bike with a dead battery is technically possible, but the weight makes it a grueling, joyless experience to be avoided at all costs.
To truly understand your personal “energy economy,” you must calibrate your consumption. Before a long adventure, perform this simple test:
- Test your e-bike on a known flat 10-mile loop at a consistent speed.
- Record the battery percentage used for each assist level.
- Factor in your weight and typical cargo load.
- Calculate your personal watts/mile consumption rate.
- Add a 30% buffer to your final calculation for headwind and fatigue factors.
Case Study: The Impact of Wind Direction on Battery Life
Wind direction makes a significant difference; a headwind on your return trip will demand more battery power than fighting it on your outward journey with a fresh battery. Smart route planning includes checking wind patterns and timing rides to minimize headwind exposure during the return journey when battery reserves are lower. This proactive approach turns a potential ride-ending problem into a manageable variable.
How to Transport Heavy E-Bikes on Car Racks Without Damaging the Frame?
Your adventure often begins before you even hit the trail: at the back of your car. Lifting a 50-70 lb e-bike onto a rack is the first logistical hurdle where things can go wrong. Muscling it up without proper technique is a recipe for a strained back or, worse, a damaged bike frame. The key is to use a platform-style hitch rack designed for the weight of e-bikes and to employ proper lifting mechanics, using your legs, not your back.
Before lifting, always remove the battery to shed 8-12 lbs. This not only makes the bike lighter but also reduces the strain on the frame’s locking mechanism during transport. When securing the bike, the golden rule is “snug, not crushed.” Most e-bike damage during transport comes from over-tightening the rack’s retention arms or straps, which can dent or even crack carbon or aluminum frames. Use padding at all contact points and ensure the arm is clamping on a strong part of the frame, avoiding the middle of a tube.
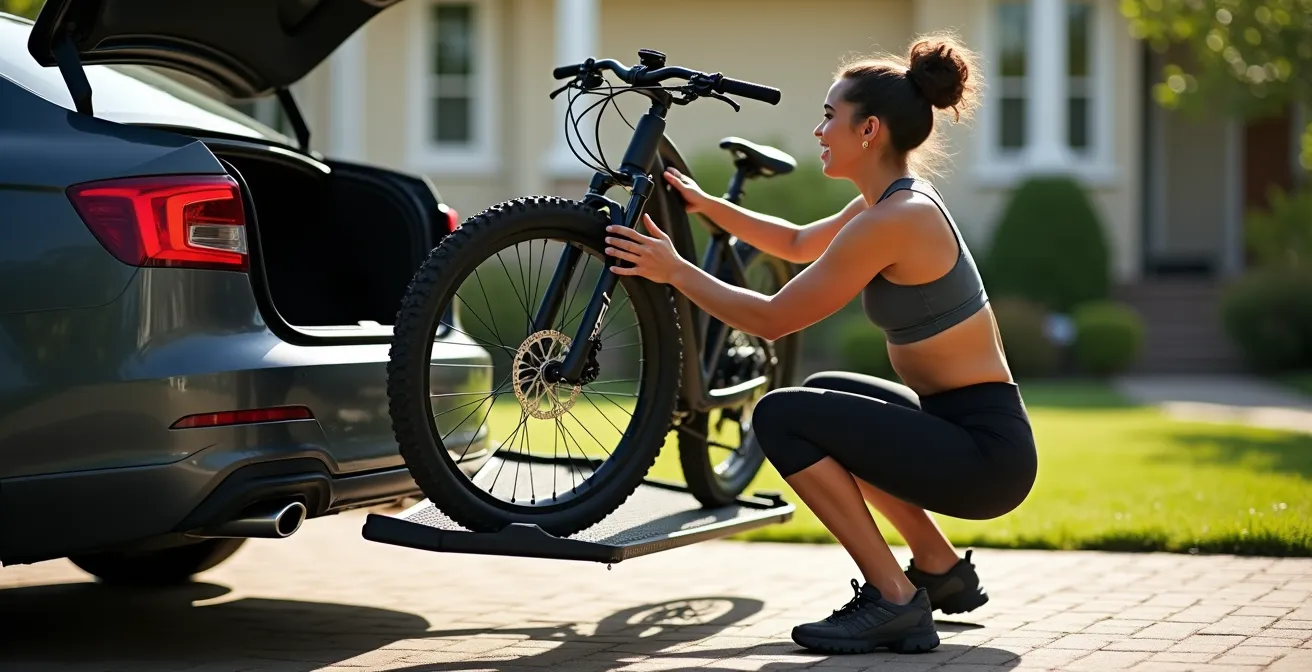
As the image demonstrates, a proper squat and a straight back are non-negotiable. But the process doesn’t end once the bike is on the rack. Vibration and bumps on the road can loosen components. Developing a “pre-flight and post-flight” inspection habit is a sign of a seasoned rider. It takes 60 seconds and can prevent a catastrophic failure miles from anywhere.
Before you leave and after you arrive, run through this mental checklist:
- Check the rack-to-car hitch connection to ensure it’s secure and meets torque specifications.
- Verify all rack arms and wheel straps are secured at the manufacturer’s recommended tension.
- Inspect frame contact points for adequate padding and pressure.
- Test strap tension—it should be firm enough that the bike doesn’t wobble, but not so tight it deforms the tire.
- After arrival, check the bike’s headset and axles for any loosening that may have occurred during the drive.
Solo Exploration: Essential Safety Protocols for Remote E-Bike Rides
The thrill of solo exploration is unparalleled, but it comes with a heightened responsibility for your own safety. Once you’re beyond reliable cell service, “calling for help” is no longer a simple option. This is where you need to implement a layered communication strategy. Relying on a single device or plan is a rookie mistake; true self-sufficiency comes from redundancy.
Your first layer is preventative: tell someone your detailed plan. Don’t just say “I’m going for a ride.” Provide your exact route, your intended start time, and a firm “panic” time for your return. The second layer is real-time tracking. Use a device like a Garmin with LiveTrack or a phone app that shares your location with your contact, so they can see your progress (or lack thereof). The third and ultimate layer is for true emergencies: a satellite messenger like a SPOT or inReach. This is your lifeline when all else fails, allowing you to send an SOS signal from anywhere on the planet.
Case Study: Implementing a Three-Tiered Communication Strategy
Successful solo riders layer their safety net. They always inform a contact of their specific route and return time (Tier 1). They then use automated GPS tracking for real-time monitoring by that contact (Tier 2). For remote rides where help is hours away, they carry a satellite SOS device for true, life-threatening emergencies (Tier 3). This system turns a single point of failure into a robust safety web.
Beyond communication, you need a “self-rescue calculus”—a clear mental flowchart for handling common problems. Panicking is counterproductive. Instead, have a pre-determined plan for each scenario:
- Flat tire: Attempt a field repair with your kit. If you get multiple flats, consider if it’s faster to walk to a main road.
- Broken chain: Try to fix it with your multi-tool’s chain tool. If unsuccessful, activate your Tier 2 communication (e.g., a text to your contact if you have a signal) and start walking.
- Dead battery 10+ miles out: Switch to eco or off, pedal unassisted, and reassess your energy and water every two miles. Don’t exhaust yourself fighting a losing battle.
- Lost/disoriented: Stop immediately. Don’t push on. Check your primary and backup GPS. If all else fails, use the sun’s position for a general direction back toward civilization.
- Mechanical failure beyond repair: Activate your satellite messenger’s help function (not full SOS unless injured). Find a safe, visible spot to wait.
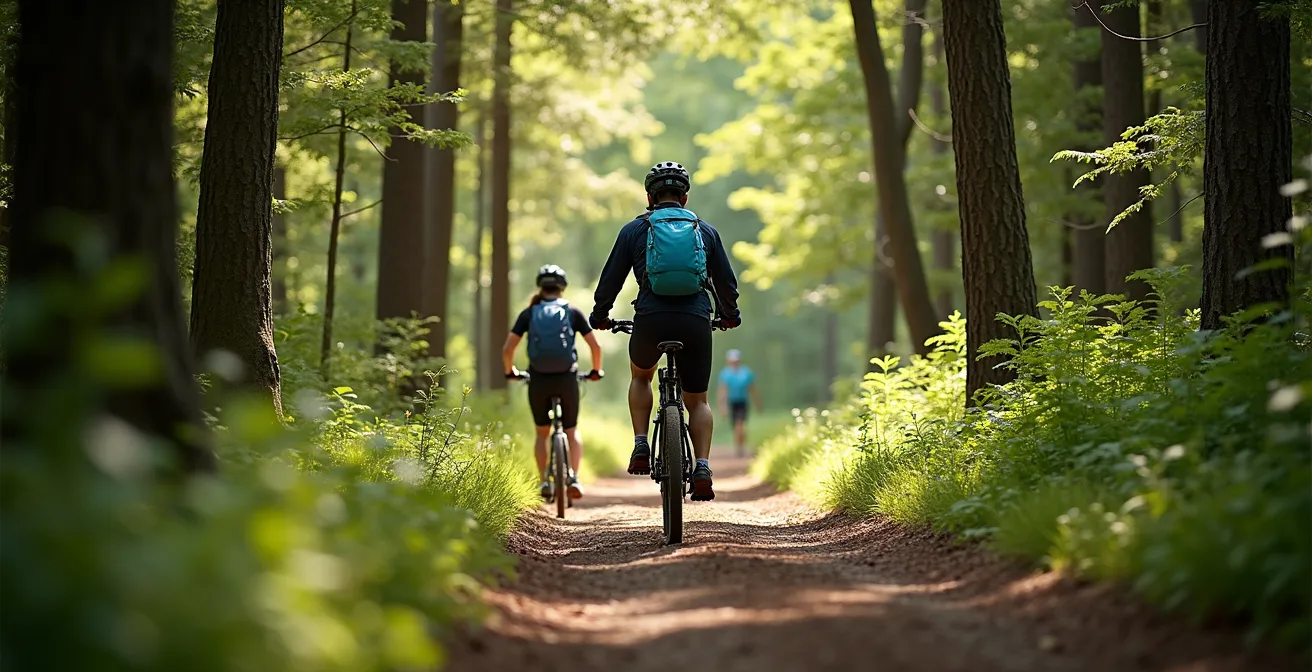
The Mistake of Riding E-Bikes on “Non-Motorized” Trails
As you venture further from paved roads, you’ll encounter a complex network of trails, many marked “non-motorized.” A common and costly mistake is assuming your e-bike is welcome everywhere a regular bike is. This misunderstanding creates conflict and can jeopardize trail access for all cyclists. It’s crucial to understand the ‘why’ behind these rules, which often has less to do with the motor itself and more to do with user conflict and land management policies.
Most trail access issues boil down to a few key factors. First, the classification of your e-bike matters immensely. Class 1 e-bikes (pedal-assist up to 20 mph) are most widely accepted on multi-use paths. Class 2 (throttle-equipped) and Class 3 (pedal-assist up to 28 mph) are more frequently restricted. Second, the land manager (e.g., National Forest, State Park, local conservancy) sets the rules. Always check their specific website before you ride. The app Trailforks is also an excellent resource for checking e-bike legality on specific trails.
The conflict isn’t truly about ‘motors’, but the speed and acceleration gap between a 20mph e-bike and a 2mph hiker or a skittish horse.
– Trail Safety Expert, E-Bike Trail Etiquette Guidelines
This insight is key. The core issue is the speed differential. Your quiet e-bike can approach hikers, equestrians, or other cyclists much faster than they anticipate, creating a hazard. On narrow singletrack, this is amplified. The responsible adventurer respects not just the letter of the law but the spirit of it. This means yielding to everyone, controlling your speed (especially around blind corners), and being a good ambassador for the sport.
Being a good trail citizen is simple: announce your presence early with a friendly “hello” or a bell, slow down significantly when passing, and always be prepared to stop. For equestrians, it’s best to stop completely, step to the side, and speak to the rider in a calm voice so the horse recognizes you as a human. This proactive courtesy prevents conflict and ensures the trails remain open and enjoyable for everyone.
When to Take Breaks: Preventing Saddle Sores on Your First 4-Hour Ride?
Your e-bike’s motor can power you for hours, but it can’t protect you from the physical toll of a long ride. For new adventurers, the first 4-hour epic is a milestone, but it’s often where the painful reality of saddle sores sets in. The biggest mistake is waiting until you feel discomfort to take a break. By then, the damage has already begun. The key to saddle comfort is a proactive, disciplined break schedule, not a reactive one.
Saddle sores are caused by a combination of three things: pressure, friction, and moisture. A proper bike fit and quality padded cycling shorts are your first line of defense, but they aren’t enough on their own. On long rides, you must systematically relieve pressure from your soft tissues. This involves both full off-bike breaks and “micro-shifts” while you’re riding. Standing up on the pedals for 30 seconds every 20 minutes is one of the most effective ways to restore blood flow and give your sit bones a rest.
Your body is part of the machine, and it requires maintenance. Follow a structured break plan:
- Set a timer on your watch or bike computer for 45-60 minute intervals. Take a break regardless of how good you feel.
- During these breaks, get off the bike for at least 5 minutes. Walk around to relieve pressure points and allow the area to dry.
- Practice micro-shifts every 10 minutes while riding: slide forward on the saddle, then back, then to the center.
- Alternate between different hand positions on the bars to change your torso angle and shift weight distribution.
- Consciously stand and pedal for 30 seconds every 20 minutes, especially on slight inclines.
Case Study: The Connection Between Core Strength and Saddle Comfort
Professional bike fitters often find that weak core muscles are a hidden cause of saddle discomfort. When a rider’s core is weak, they tend to slump forward, placing excessive and constant pressure on soft tissues instead of distributing their weight between the saddle and handlebars. A comprehensive approach to comfort therefore includes not just on-bike strategy, but also off-bike core strengthening exercises and a proper bike fit that encourages good posture.
When to Download Maps: Navigating Dead Zones Beyond City Limits
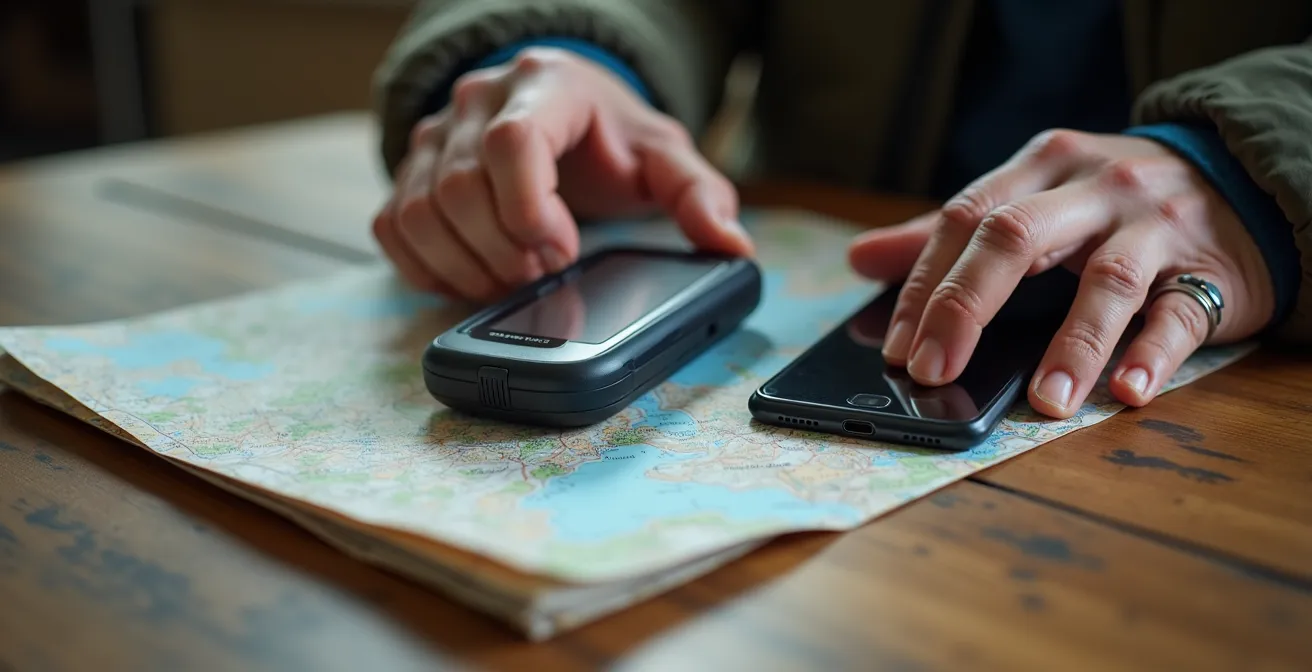
Your smartphone is a powerful navigation tool in the city, but in the backcountry, it can become a useless brick. The moment you plan a route that leaves reliable cell coverage, you must switch your mindset from “live streaming” a map to carrying a self-contained, layered navigation system. The cardinal rule is: if you might lose signal, download your maps for offline use before you leave. There is no excuse for getting lost because you failed to prepare.
Experienced riders never trust a single source of information. Your primary tool might be a dedicated GPS device like a Garmin or Wahoo, which is built for the job. Your backup should be your phone, with the route and surrounding area downloaded in an app like Komoot, Ride with GPS, or Google Maps. Your ultimate failsafe, especially in truly remote areas, is a simple paper map and a compass. This layered approach ensures that a dead battery or a shattered screen on one device doesn’t leave you stranded.
But preparation goes beyond just downloading. A “digital scout session” is what separates the pros from the amateurs. It involves using the powerful tools available at home to understand the terrain before you’re on it. This foresight minimizes the stress of unknown places and maximizes enjoyment.
Your Pre-Ride Digital Scouting Checklist
- Analyze Satellite View: Use satellite imagery to identify areas of dense tree canopy that could block GPS signals, or to spot potential obstacles not shown on the map.
- Check Surface Conditions: Use Google Street View’s “look-around” feature on any paved sections to verify the actual road or path surface conditions and shoulder width.
- Review the Terrain Layer: Look at the topographic lines to anticipate the steepness and length of climbs and technical descents. Foreknowledge prevents unwelcome surprises.
- Download a Wide Area: When downloading offline maps, save a map that covers at least a 20% wider area than your planned route. This gives you options if you need to detour.
- Save GPX Files Locally: Save the route’s GPX file to multiple devices (GPS unit, phone) and even email it to yourself as a final backup.
When to Pack a Trauma Bandage vs Just Band-Aids?
Your first-aid kit should not be a static, one-size-fits-all pouch. It should be a modular system that you scale based on the risk profile of each specific ride. For a quick spin on a protected urban bike path, a few band-aids and antiseptic wipes might suffice. But the moment you venture onto gravel roads or road shoulders with traffic, the potential for serious injury increases exponentially. This is when you must ask the critical question: “How long would it take for professional help to reach me?”
The answer dictates your level of preparation. The guiding principle in emergency medicine is the “golden hour,” which states that a trauma patient’s chances of survival are highest if they receive definitive care within the first sixty minutes. If your ride takes you more than 30 minutes away from a point where an ambulance could easily reach you, your kit needs to include tools to manage severe bleeding. According to this principle of emergency medicine, the ‘golden hour’ gives you approximately 60 minutes to get to definitive care, and your job is to stay stable until then.
A simple band-aid is for scrapes; a trauma bandage (like an Israeli bandage) is for stopping the kind of bleeding that can be life-threatening. The decision to carry one is a simple risk assessment. Fast gravel descents where a fall could cause a deep laceration, or riding on a road shoulder where a collision is a remote but real possibility, are clear indicators for carrying more advanced medical supplies. Your kit should be scalable.
Adopt a modular approach to your first-aid kit:
- Core Kit (Always on bike): Band-aids of various sizes, antiseptic wipes, medical tape, and blister treatment.
- Adventure Module (Add when 30+ min from help): An Israeli-style pressure bandage, a commercial tourniquet (and the knowledge to use it), and nitrile gloves. A chest seal is an advanced addition for very remote or high-risk rides.
- Assess Risk Before Each Ride: Before you head out, think about the specific “mechanism of injury” possible on your route. High-risk indicators include fast descents, shared roads with high-speed traffic, and extreme remoteness. Low-risk indicators include flat, separated bike paths and group rides with a support vehicle.
Key Takeaways
- Always reserve a 30% battery buffer for your return trip to account for wind and fatigue.
- Use a layered safety system for solo rides: inform a contact, use live tracking, and carry a satellite messenger for remote areas.
- Your first-aid kit should be modular; add trauma supplies like a pressure bandage if you’ll be more than 30 minutes from help.
Credit Card Touring vs Camping: Managing E-Bike Charging Logistics on the Road
Once you’ve mastered single-day adventures, the horizon expands to multi-day trips. This is the ultimate test of logistical foresight, and it presents a fundamental choice in philosophy: “credit card touring” versus camping. The decision hinges almost entirely on one crucial variable: e-bike charging logistics. Each style offers a different kind of freedom and a distinct set of challenges.
“Credit Card Touring” is the simpler approach. You ride from town to town, staying in hotels or motels each night. Your equipment is minimal—just your charger and a change of clothes. The primary logistical task is planning your daily mileage (typically 40-60 miles) to ensure you reach a destination with a guaranteed electrical outlet. The main challenge is confirming that your lodging is bike-friendly and will allow you to bring your bike inside or to a secure location for overnight charging.
Camping or off-grid touring offers ultimate freedom from towns but introduces significant charging complexity. You are your own power station. This typically requires carrying a portable power station (a large battery bank) or a system of solar panels. This adds substantial weight (15-25 lbs) and limits your daily range, as you need to conserve energy and can’t rely on a full charge every morning. Solar charging is weather-dependent and slow, often requiring a full day of sun to significantly recharge your e-bike battery. However, the falling cost of battery technology, with some reports showing Lithium-ion pack prices fell 20% in 2024, is making portable power solutions more accessible.
The choice between these two styles comes down to what kind of adventure you seek. Here is a direct comparison of the key logistical factors:
| Aspect | Credit Card Touring | Camping/Off-Grid |
|---|---|---|
| Charging Access | Hotels, cafes, restaurants | Portable power stations, solar |
| Daily Range Needs | 40-60 miles between stops | 20-30 miles with backup power |
| Equipment Weight | Minimal (charger only) | +15-25 lbs for power solutions |
| Cost per Night | $80-150 (lodging) | $0-30 (campsite) |
| Planning Complexity | Must confirm outlet access | Weather-dependent solar charging |
Ultimately, transitioning from a city rider to a backcountry explorer is a journey of building confidence through competence. By mastering the logistics of battery management, transport, safety, and navigation, you dismantle the barriers of fear one by one. The road and the trail are waiting; now you have the map to get there and back safely.