Maintenance and repairs
Your bicycle is more than just a mode of transportation or a piece of sporting equipment—it’s a finely tuned machine that deserves proper care and attention. Whether you’re commuting through city streets, tackling mountain trails, or enjoying leisurely weekend rides, regular maintenance and timely repairs are the foundation of a safe, enjoyable cycling experience. A well-maintained bike responds better, lasts longer, and keeps you safer on every ride.
Understanding the basics of bike maintenance might seem intimidating at first, but the reality is that most essential tasks are surprisingly accessible, even for complete beginners. This comprehensive resource will walk you through the fundamental aspects of bicycle care—from the tools you’ll need to the specific techniques for keeping each component in peak condition. You’ll discover which tasks you can confidently tackle at home and when professional expertise becomes necessary.
Why Regular Bike Maintenance Matters
Many cyclists view maintenance as an optional chore, something to address only when problems become obvious. This reactive approach, however, misses the profound benefits that preventive care delivers across multiple dimensions of your cycling experience.
Safety First
The most compelling reason to maintain your bike regularly is rider safety. A properly functioning brake system can mean the difference between a controlled stop and a dangerous collision. Similarly, a worn chain that snaps mid-ride or a tire that suddenly deflates can create hazardous situations, especially at speed or in traffic. Regular inspections catch these issues before they become emergencies, giving you confidence that your bike will respond predictably when you need it most.
Cost Savings Over Time
Here’s a truth that surprises many cyclists: preventive maintenance actually saves money. A chain that costs around $25-40 and receives regular cleaning can last thousands of miles. Neglect that same chain, and it will wear down your cassette and chainrings—components that together can cost $150-300 to replace. Think of maintenance as an investment rather than an expense. Spending 15 minutes weekly on basic care protects components that would cost significantly more to replace prematurely.
Performance and Riding Pleasure
There’s an undeniable joy in riding a bike that’s been properly cared for. Smooth gear shifts, quiet operation, responsive braking, and efficient power transfer—these qualities transform an ordinary ride into something special. A neglected bike, by contrast, announces itself with creaks, grinding sounds, and sluggish performance that sap both efficiency and enjoyment from every pedal stroke.
Essential Tools for Home Bike Maintenance
Building a basic toolkit doesn’t require emptying your wallet or transforming your garage into a professional workshop. Start with these fundamental tools that handle the majority of common maintenance tasks:
- Multi-tool with hex keys (Allen wrenches) in sizes 4mm, 5mm, and 6mm
- Chain cleaning device or sturdy brushes
- Tire levers for removing tires from rims
- Floor pump with pressure gauge
- Chain lubricant appropriate for your riding conditions
- Degreaser for drivetrain cleaning
- Clean rags or shop towels
- Spare tubes in your tire size
As your confidence grows, you can gradually add specialized tools like a chain wear indicator, cable cutters, or a torque wrench. This progressive investment approach prevents overwhelming initial costs while ensuring you have what you need for tasks you’re ready to tackle.
Keeping Your Drivetrain Running Smoothly
The drivetrain—comprising your chain, cassette, chainrings, and derailleurs—is the heart of your bike’s power delivery system. It’s also one of the most maintenance-intensive areas, exposed to dirt, moisture, and constant mechanical stress.
Chain Care and Cleaning
Your chain deserves attention more frequently than any other component. In dry conditions, cleaning every 100-200 miles maintains optimal performance; wet or muddy rides may require cleaning immediately afterward. Use a degreaser and brush to remove accumulated grime, then rinse thoroughly and dry completely before applying fresh lubricant. Apply lube to the inside of the chain while rotating the pedals backward, then wipe away excess—too much lubricant actually attracts more dirt.
Cassette and Chainring Inspection
While cleaning your chain, take a moment to inspect the teeth on your cassette and chainrings. Healthy teeth have a relatively uniform, squared-off profile. Worn teeth develop a shark-fin appearance—pointed and hooked. If you notice this wear pattern, or if your chain skips under pedaling pressure even after adjustment, replacement is likely overdue. Replacing your chain before it’s severely worn prevents this expensive domino effect.
Derailleur Adjustment Basics
Derailleurs that shift crisply and accurately make cycling dramatically more enjoyable. Most shifting issues stem from cable tension rather than the derailleur itself. If shifts to larger cogs (easier gears) are sluggish, increase cable tension by turning the barrel adjuster counterclockwise. Reluctance to shift to smaller cogs (harder gears) requires the opposite—decrease tension by turning clockwise. Make quarter-turn adjustments and test between each change for best results.
Brake Maintenance for Reliable Stopping Power
Brakes represent your bike’s most critical safety system, deserving careful attention and regular inspection regardless of your riding frequency or conditions.
Rim Brakes vs. Disc Brakes
Understanding your brake type shapes your maintenance approach. Rim brakes—including caliper and V-brakes—work by squeezing the wheel’s rim and are generally simpler to adjust and service. Disc brakes, whether mechanical or hydraulic, offer superior stopping power in all conditions but require different maintenance techniques. Both types share common principles: clean braking surfaces, properly positioned pads, and appropriate cable or fluid condition.
Checking and Replacing Brake Pads
Brake pads wear gradually, making regular inspection essential. For rim brakes, examine the pad surface—most have wear indicator grooves that disappear when replacement is needed. Generally, if less than 2-3mm of pad material remains, it’s time for new pads. Disc brake pads require removal for accurate inspection, but listening provides clues: metal-on-metal grinding sounds indicate pads worn to backing plates. Replace pads well before reaching this point to protect your rotors or rims.
Cable and Hydraulic Systems
Cable-actuated brakes require periodic cable replacement as cables stretch and fray over time. Inspect cables for rust, fraying near the lever or caliper, or stiff movement within the housing. Hydraulic systems eliminate cables but require occasional fluid replacement and bleeding to remove air bubbles. While cable maintenance is DIY-friendly, hydraulic brake service often benefits from professional expertise, especially for your first time.
Wheel and Tire Care Essentials
Wheels and tires form your sole contact with the road or trail, making their condition fundamental to both performance and safety.
Tire Pressure and Inspection
Proper tire pressure dramatically affects how your bike rides, handles, and resists punctures. Check pressure before rides using your floor pump’s gauge—tires naturally lose pressure over time even without punctures. The recommended range appears on your tire’s sidewall. Higher pressures within that range suit smooth roads and reduce rolling resistance, while lower pressures improve traction and comfort on rough surfaces. While checking pressure, inspect for embedded debris, cuts, or unusual wear patterns that might cause future problems.
Fixing Flat Tires
Flat tire repair is perhaps the most essential skill for any cyclist. The process is straightforward: remove the wheel, use tire levers to carefully pry one side of the tire off the rim, remove the damaged tube, inspect the tire’s interior for the puncture cause (glass, thorns, spoke ends), install a new or patched tube, and reseat the tire. Practice this process at home before you need the skill roadside—the confidence gained transforms a potential ride-ending crisis into a minor inconvenience.
Wheel Truing Basics
Perfectly true wheels spin without wobbling side-to-side or up-and-down. Over time, impacts and stress can create wobbles visible when spinning the wheel. Minor truing—adjusting spoke tension to eliminate small wobbles—is learnable with patience and a spoke wrench. However, significant damage, broken spokes, or persistent problems warrant professional wheel building expertise. Think of basic truing as regular maintenance, but major reconstruction as specialized work.
The Art of Cleaning and Lubrication
Regular cleaning does more than maintain appearances—it’s preventive medicine for your entire bike. Dirt acts as grinding paste, accelerating wear on every moving part it contacts. A clean bike also makes problems visible; that small crack or loose bolt is easier to spot without a layer of grime camouflaging it.
Establish a cleaning routine based on your riding conditions. Casual riders in dry conditions might clean monthly, while mountain bikers or wet-weather commuters may need weekly attention. Use bike-specific cleaners or mild dish soap with water, soft brushes for scrubbing, and plenty of rinsing. Avoid high-pressure washers, which force water into bearings designed to keep moisture out.
After cleaning and drying, apply appropriate lubricants to key areas: chain, derailleur pivots, brake and shift lever pivots, and pedal springs. Match your lubricant to conditions—wet lubes for rainy riding resist washout but attract more dirt, while dry lubes stay cleaner but require more frequent application in wet weather. Remember the golden rule: lubricate moving parts, keep lubricant away from braking surfaces.
When to DIY vs. When to Visit a Professional
Developing maintenance skills builds confidence and saves money, but wisdom also means recognizing when professional expertise delivers better results. Most routine maintenance falls comfortably within DIY territory: cleaning, basic adjustments, brake pad replacement, flat tire repairs, and chain replacement are all learnable skills with modest tool requirements.
Consider professional help for tasks requiring specialized tools, precise measurements, or significant experience: wheel building and major truing, hydraulic brake bleeding (especially your first time), bearing overhaul and replacement, suspension service, and frame damage assessment. Additionally, if you’ve attempted an adjustment or repair without success, a professional can both solve the immediate problem and help you understand what the issue requires.
Think of your local bike shop as a partner in your cycling journey rather than a last resort. Many shops offer workshops teaching basic maintenance skills, and building a relationship with knowledgeable mechanics provides invaluable guidance as your abilities develop.
Bicycle maintenance ultimately represents an investment in freedom—the freedom to ride confidently, knowing your bike will perform reliably when you need it. Starting with basic tasks and progressively building skills creates a rewarding cycle: better maintenance leads to better performance, which makes riding more enjoyable, which motivates continued learning. Each skill mastered expands your independence and deepens your connection with your bike, transforming maintenance from a chore into an integral part of the cycling experience itself.

Schwalbe Marathon vs Generic: Is the $50 Price Difference Worth It for Commuters?
The $50 premium for a Schwalbe Marathon tire is not an expense, but an investment that yields a lower Total Cost of Ownership (TCO) for any commuter who values predictable uptime. Cheap tires introduce hidden costs through increased rolling resistance,…
Read more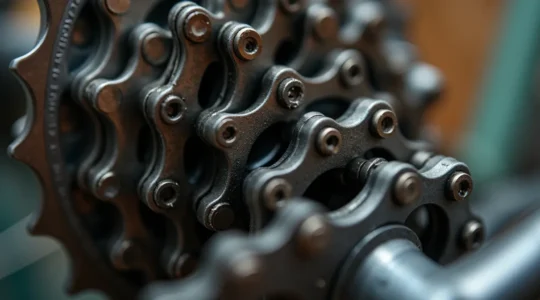
Why E-Bikes Eat Chains: Managing Wear on High-Torque Mid-Drive Systems
The shocking cost of replacing an e-bike chain isn’t a maintenance failure; it’s a predictable materials science problem caused by motor torque physically stretching the steel. High-torque motors cause “micro-stretching” of chain links, which is different from simple surface wear…
Read more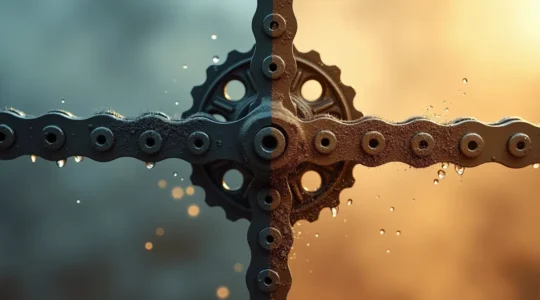
Wet vs Dry Lube: Choosing the Right Chain Protection for Your E-Bike
The extreme torque of a mid-drive e-bike renders conventional lubrication methods not just ineffective, but actively destructive to your drivetrain. High torque accelerates chain elongation (stretch) at a rate far exceeding that of a non-assisted bicycle, making proactive measurement critical….
Read more
Firmware Updates: Do They Really Improve Motor Efficiency and Range?
Firmware updates are not simple upgrades; they are complex system recalibrations that trade raw power for long-term hardware health and safety. Updates often remap the motor’s power curve, which can feel “slower” but improves efficiency and reduces component wear. Ignoring…
Read more
Riding in the Rain: Protecting Sensitive Electronics from Moisture Damage
In summary: Standard IP54 ratings are insufficient against heavy rain; they only protect from light splashes, not sustained jets or immersion. Proactively seal critical electronic connectors with dielectric grease or ACF-50 to prevent corrosion before it starts. If electronics get…
Read more
Troubleshooting E-Bike Error Codes: What Your Display Is Telling You
An error code isn’t a failure; it’s a diagnostic signal from your e-bike asking for attention before a real problem occurs. Most common errors stem from simple issues like loose connections, dirty pins, or incorrect shutdown procedures. Preventive care, such…
Read more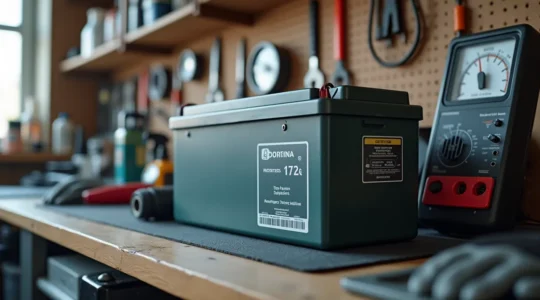
How to Make Your $500 E-Bike Battery Last 5 Years, Not 2
The difference between a 2-year and a 5-year battery life isn’t luck; it’s a deliberate strategy based on understanding its core chemistry. Avoid charging to 100% for daily use and never store the battery fully charged or completely empty to…
Read more
The 15-Minute Weekly Bike Check That Prevents 80% of Roadside Breakdowns
In summary: E-bikes suffer from accelerated wear on parts like chains and brake pads due to higher torque and weight. This routine is not a chore; it’s a diagnostic system to spot subtle symptoms of wear before they cause a…
Read more
How to Extend Your E-Bike Range by 20% Without Buying a New Battery?
In summary: Your e-bike’s advertised range is a baseline, not a limit; disciplined riding and gear choices can unlock up to 20% more distance. Focus on reducing “energy waste” from soft tires, excessive weight, and high-assist modes, which can collectively…
Read more